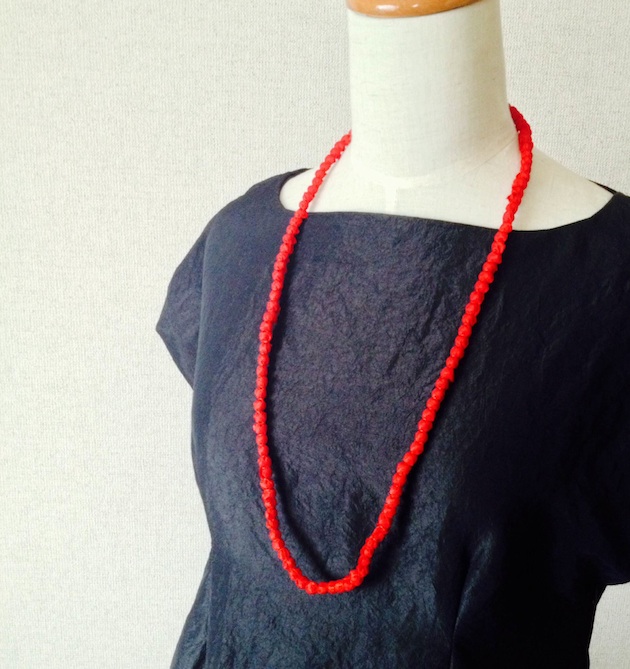
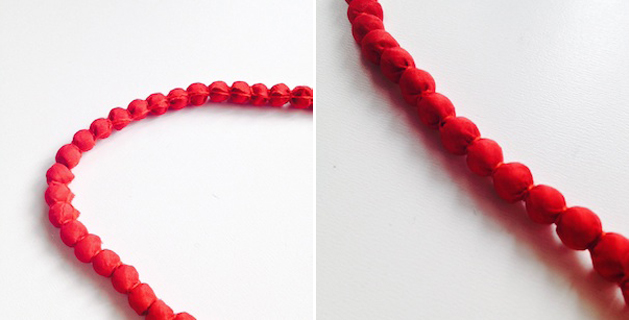
When I went window-shopping at LUMINE Yurakucho, I found an interesting necklace. The necklace looks a bit like jyuzu (数珠), which is worn to a funeral in Japan. I was somewhat attracted by the uniqueness, and I felt that it would fit my casual clothes. But I hesitated to buy it, since it was not cheap. So I decided to make it by myself!
Supplies
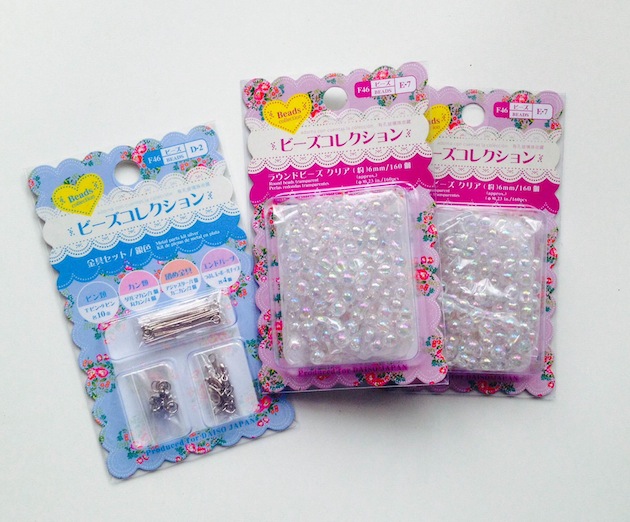
-120 beads, 6mm in diameter
The metal parts for clipping at the end of a necklece.
-Nylon thread for stringing beads.
I used cotton thread for beads. I think any type of thread is fine except wire.
-Fabric.
For 2.5cm wide, 6mm length size beads, stretched or biased fabrics are recommended. Cut fabric 5mm wider than a bead circumference, and 15cm or more longer than a length of necklace.
-Embroidery thread.
I pulled two strands out of six from the embroidery thread.
I bought the beads and the metal clips at 100 yen shop. The threads and fabric are frommy stock. So the total cost I paid for this necklace is only 300yen!
Let’s get started!
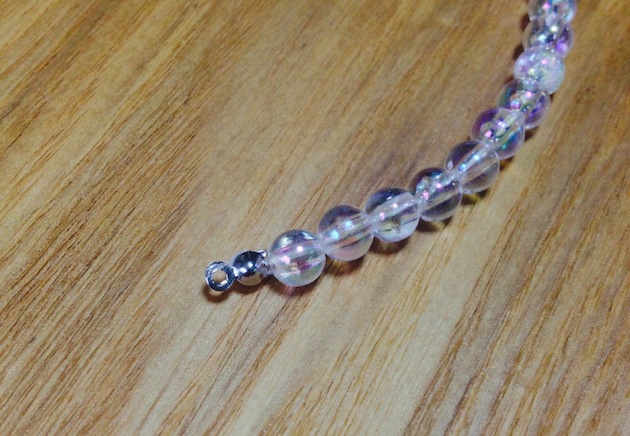
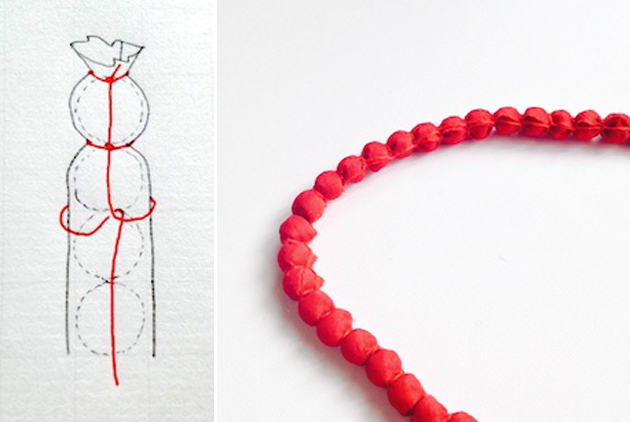
Step 1: string beads.
Step 2: set the clip at the one side of the end. please do not cut the nylon thread on the other side, so that you can adjust it later.
Step 3: fix the one side, and wrap the cloth on beads with embroidery thread.
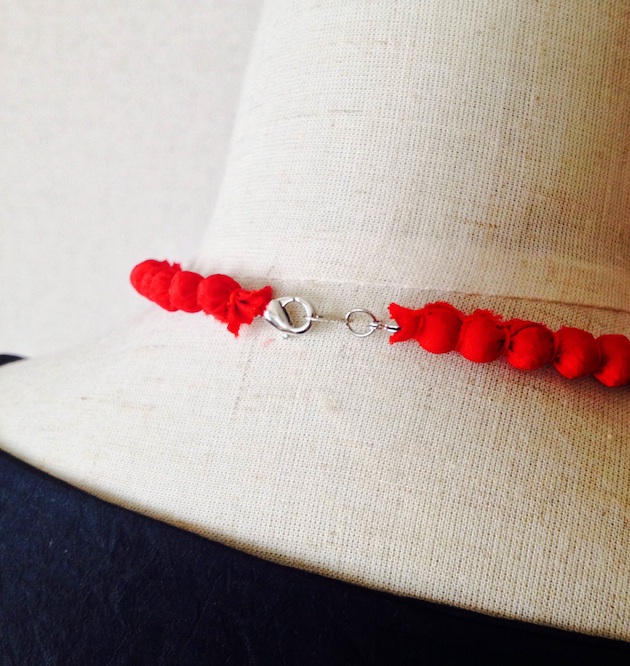
Step 4: attach the clip at the other side of the end.
That’s it! Adjust the thread strength and jamming while wrapping the fabric around the beads, since the beads and thread can easily get twisted.
It might take some time to make it, but it isn’t hard at all 🙂 Please feel free to leave comments if you have any question.
I didn’t do anything on the selvage, since it didn’t seem like it will fray. I’m wondering if there is more sophisticated way to deal with the selvage…
*****
数珠のようなビーズのネックレスを見かけて、なんだか心惹かれました。普段は小さなジュエリーを付けることが多いけど、これなら普段の服にも合いそう…。でも高い!ということで自分で作ってみました!
必要なもの
・ビーズ120個(6mm)
・留め具
・ビーズ用のテグス(適度な堅さと丈夫さがあればなんでもいいと思います。でもワイヤーはやめた方がいいかも)
・布(6mmビーズには2.5cmの幅に裁断しました。幅は使うビーズの円周+5mmくらい、長さは欲しいネックレスの長さ+15cmくらい必要。)
・刺繍糸(2本取りして使いました)
ビーズと留め具は100円ショップでも売ってます!
作り方
Step1: ビーズをテグスに通す。
Step2: 片方の端を留め具で止める。このとき、反対側のテグスは切らずにおいておくことをおすすめします!あとからビーズの調整がききます。
Step3: 留め具を付けた先端を固定し、ビーズに刺繍糸を使って布を巻く。
Step4: 切らずに残しておいた反対側のテグスに留め具を付け、完成!
布を巻いてる間にビーズがよれてくるので、調整しながら巻くようにして下さい。作業時間がかかりますが、慣れてしまえば簡単にできます!
私は、ポリエステルシャンブレーの生地を使ったので、布の端が解れることなく、そのままにしてしまったのですが、見た目があまり綺麗じゃない。。。何かもっといい処理方法があればいいのだけれど。
 More Rina’s posts….
– Fashion’s Night Out in Tokyo
– Silk Painting Groom’s Vest
– Wedding Project Progress: Dress Completed!

 MADE | Navy Blue Lace Dress
 Mint Color
 floral + black + red
 Happy 4th of July Sale!
[…] – DIY: Bead Necklace – Fashion’s Night Out in Tokyo – Silk Painting Groom’s Vest […]